
Request bodies
Most non-GET requests need a body. Rewind supports five modes: none, raw, URL-encoded, multipart, and binary. The right one depends on the API you're calling.
Choosing a mode
In the request area, click the Body tab. The first dropdown on the left picks the mode. The rest of the tab swaps to the editor for that mode.
| Mode | When to use it | Content-Type sent |
|---|---|---|
| None | GET, HEAD, or any request without a body. | (no body) |
| Raw | JSON, XML, plain text, anything you'd write by hand. | The value you pick in the next dropdown. |
| URL-encoded | HTML form posts. | application/x-www-form-urlencoded |
| Multipart | Uploading files together with text fields. | multipart/form-data (set by the browser) |
| Binary | Uploading a single file with no other fields. | Whatever the server expects. |
GET and HEAD requests do not show this tab at all; their body is always empty.
None
Default. Sends no body. The Backend will reject any attempt to attach a body to a GET or HEAD request with the message: "GET requests cannot include a body" (or HEAD).
Raw
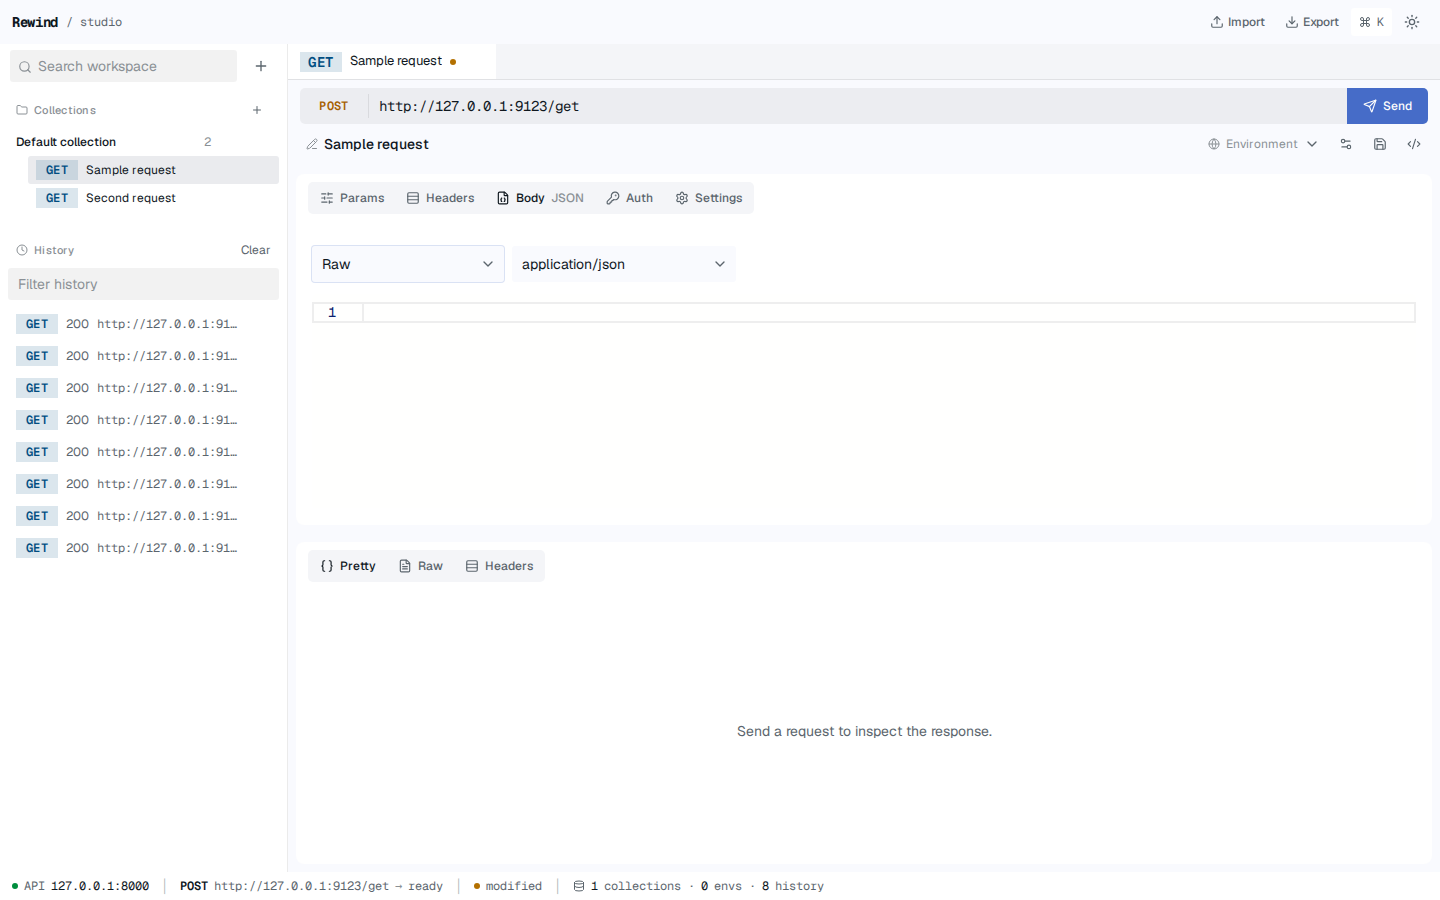
The Raw mode is a small code editor. Pick a content type from the second dropdown (application/json, text/plain, application/xml, text/html, application/javascript), then type the body. The editor's syntax highlighting matches the chosen content type.
If you've set a Content-Type header manually in the Headers tab, that value wins. Rewind does not overwrite it.
Screenshot — Raw mode with the content-type dropdown and the code editor
Variables
{{variable}} placeholders inside a raw body are substituted before the request is sent. This is the easiest way to inject a timestamp, a token, or a user ID into a JSON body.
{
  "name": "{{userName}}",
  "issuedAt": "{{timestamp}}"
}
URL-encoded
A second key/value table, just like Params and Headers. Each row is encoded with encodeURIComponent and concatenated as key=value pairs separated by &. The Content-Type is set to application/x-www-form-urlencoded automatically unless you've set a Content-Type header manually.
Multipart
Each row in the multipart editor is either a text field or a file field. Text fields are typed in directly. File fields are filled in by clicking the row's Choose file button and picking a local file.
Uploaded files are copied into the local workspace under the data directory, and the request stores an attachment ID instead of the path. That way, the saved request stays portable: sending it from a different machine uses the stored copy, not a path that no longer exists.
Content-Type is left unset on the request — fetch will set it with a proper boundary. If you've set a Content-Type header manually, the multipart parts will be sent without a boundary, and the server will reject them.
Binary
Picking Binary turns the tab into a single file drop target. Click it, pick a file, and the file's name appears in place of "Choose a binary file." The file is stored as an attachment, the same as a multipart file field.
If you need a Content-Type other than what the file's extension suggests, set it as a header on the Headers tab.
Limitations
- The current editor doesn't support streaming bodies. For very large uploads, a CLI runner or a custom script is more appropriate.
application/x-www-form-urlencodedandmultipart/form-dataare the only "form" modes. If you need a custom form encoding, use Raw and write the body yourself.- File uploads are limited to 100 MB per file (the server's configured maximum attachment size). See Storage settings for the related limits.
What's next?
- Authentication — a special-cased way to attach credentials
- Request settings — timeout, redirects, cookie jar
- Environments — define the variables your body references